Install
National Instruments
Data Acquisition (DAQ)
Measurement & Automation Explorer version 5.4.0 2012
Double click on NI MAX icon on Desktop
In this example, a device was detected : Ni USB-6008
.
As in the upper image, if the device is “selected”, some commands like “self-test”, Test Panels…”, “Reset Device”,… are available. Selecting “Test Panels” you can start data acquisition.
Ni USB-6008
12-Bit, 10 kS/s Low-Cost Multifunction DAQ
.
.
LabVIEW 2012
Do you know that a student version is available !… and you can also request a DVD installation.
LabVIEW programs are called virtual instruments, or VIs, because their appearance and operation imitate physical instruments, such as oscilloscopes and multimeters. LabVIEW contains a comprehensive set of tools for acquiring, analyzing, displaying, and storing data, as well as tools to help you troubleshoot code you write.
In LabVIEW, you build a user interface, or front panel, with controls and indicators. Controls are knobs, push buttons, dials, and other input mechanisms. Indicators are graphs, LEDs, and other output displays. After you build the user interface, you add code using VIs and structures to control the front panel objects. The block diagram contains this code.
You can use LabVIEW to communicate with hardware such as data acquisition, vision, and motion control devices, as well as GPIB, PXI, VXI, RS232, and RS485 instruments.
Double click on LabVIEW icon on Desktop
.
Front Panel
.
Block Diagram
.
.
VI Package Manager ( Example : Installing Labview interface for Arduino )
VI – Virtual Instruments
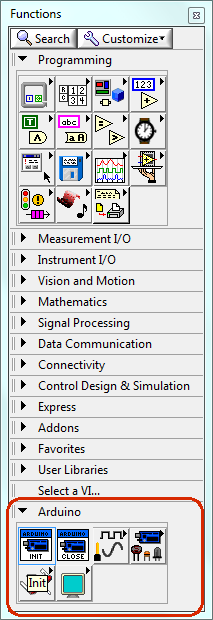
Look, there is a “Labview Interface for Arduino” !!!
Double-Click on “Labview Interface for Arduino” to install VIs (Virtual Instruments) for Arduino.
After that, when opening LabView, you will see the new added VIs in Functions Palette :
.
.
Drivers
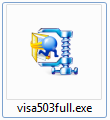
Download and install visa503full.exe to install Drivers for Arduino
.
Introduction
Labview is a graphical programming language that uses icons instead of lines of text to create applications.
You can purchase several add-on software toolkits for developing specialized applications.
You can access hundreds of VIs on the NI Developer Zone – zone.ni.com.
Create new VI – Virtual Instruments
LabVIEW programs are called Virtual Instruments (VIs)
select File>>New
Then select ….
Examples
many examples, select Help >> Find Examples…
Front Panel / Block Diagram
Each VI has two windows:
– Front Panel, User Interface UI, How the user interacts with the VI.
– Block Diagram, Graphical Code, the code that controls the program. In some ways, the block diagram resembles a flow chart.
<Ctrl+E> toggle between Front Panel and Block Diagram
When you create an object in Front Panel, a terminal is created on the block Diagram, and vice-versa.
In general, blue terminals should wire to blue terminals, green to green, and so on. But this is not a hard-and fast rule, but in most of cases look for a match in colors.
You interact with the front panel when the program is running. You can control the program,change inputs, and see data updated in real time. Every front panel control or indicator has a corresponding terminal on the block diagram.
Controls have a thick border and an arrow on the right side. Indicators have a thin border and an arrow on the left side.
Each wire must have one (but only one) source or control, and each wire may have multiple destinations or indicators.
Controls / Functions Palette
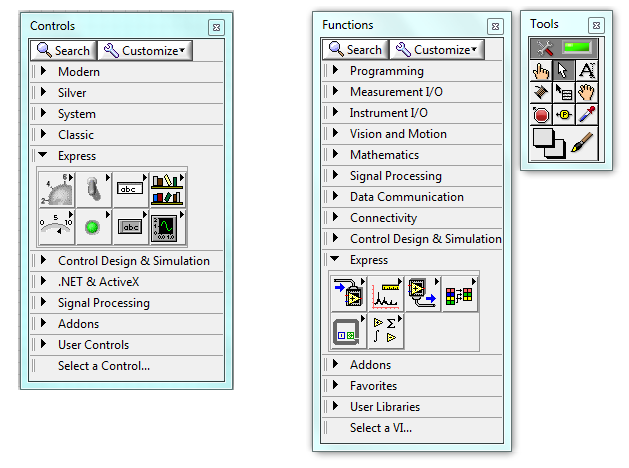
Use the Controls palette to place controls and indicators on the front panel. select view>>Controls PaletteUse the Functions Palette to build the block Diagram, select view>>Functions Palette.
Use Tools Palette to change values, labeling, positioning, wiring…. select view>>Tools Palette.
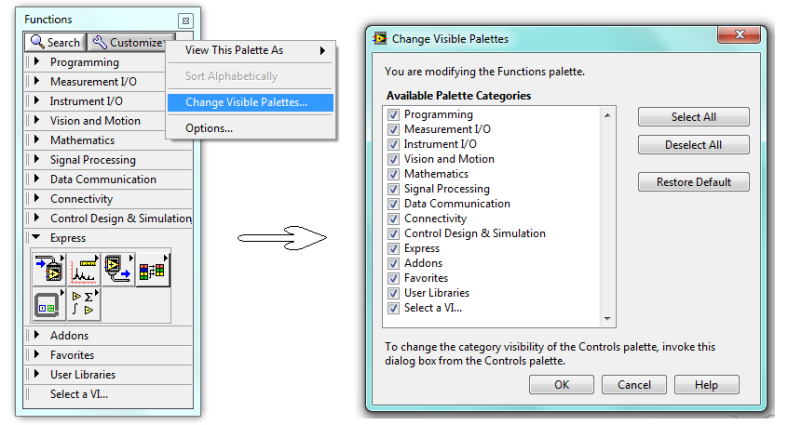
Change to visible all available categories Palette
Context Help Window
The context help Window display basic information about LabVIEW objects when you move the cursor over each object.
To display the Context help Window, select Help >> Show Context Help, or press the <Ctrl+H> keys
DAQmx
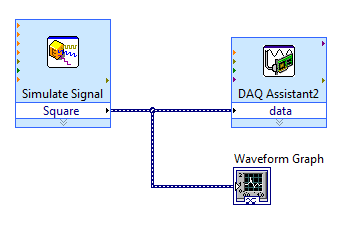
In NI-DAQmx, a task is a collection of one or more channels, timing, triggering, and other properties.
Conceptually, a task represents a measurement or generation you want to perform.
Create SubVI
Select the section of the block diagram you want to reuse and select Edit>>Creat SubVI.A subVI node corresponds to a subroutine in text-based programming language.
.
.
.
.
.
.
.
.
.
.
.
.
.
.
.
.
.
.
.
.
.
.
.
.
.


